Kim’s Crunchie Bar No-Bake Cheesecake | Easy & Irresistible Dessert
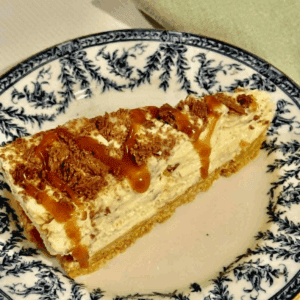
A creamy filling, buttery biscuit base, and plenty of honeycomb chocolate crunch. It’s the perfect combination of light, sweet, and downright irresistible.
Print Recipe
Ingredients
The Base
- 250 g plain vanilla wine biscuits crushed
- 125 g butter melted
The Filling
- 450 g cream cheese softened by leaving it out on the bench for at least an hour
- 2 tsp vanilla essence vanilla bean paste would be nice if you have it
- 2 cups heavy cream just plain whipping cream
- ½ cup icing sugar also known as powdered sugar
- 3-4 cunchie bars roughly chopped (roughly 200g worth)
Topping
- 1 cadbury Flake bar crumbled
- ½ cup caramel sauce use my homemade caramel sauce recipe linked in the post
Instructions
- To make the cheesecake base, crush biscuits until fine, then mix with melted butter. Press into the base of a 20 cm springform tin and refrigerate while you prepare the filling.
- In a large bowl, beat room temp cream cheese until smooth. Add the cream and vanilla essence. Continue whisking until the cream cheese and cream are combined. They should be nice and thick. Do not over beat this mixture. Add the crushed crunchie bars.
- Spoon the mixture over the chilled base, smoothing the top. Refrigerate for 4–6 hours or overnight until set.
- Just before serving, drizzle with extra caramel sauce, and crumble over the flake. Slice and serve chilled.
- Keep in the fridge for up to 4 days. The cheesecake tastes better as it ages.
Notes
Stacey's Kitchen Tips
- Chill time matters: Letting it set overnight makes slicing so much easier.
- No mixer? A good whisk and a bit of elbow grease work fine — it’s a forgiving recipe.
- Caramel shortcut: If you don’t have time to make homemade caramel, use a store-bought one. For the best flavour, I still swear by my own pot-made caramel sauce.
- Honeycomb hack: Bash the crunchie bars while they are still in the wrapper, to avoid sticky hands. Use a rolling pin or something heavy. Do over crush them. You still want chunks of crunchie and chocolate through the filling.
- Chocolate Caramel Dream: Add 2 Tbsp cocoa to the base and a drizzle of chocolate ganache on top.
- Mini Cheesecakes: Press base and filling into lined muffin tins for individual desserts.
- Biscuit swap: Try Gingernuts or Digestives for a deeper flavour base.
- Add nuts: Sprinkle crushed hazelnuts or almonds over the top for extra crunch.
Servings: 8 servings