Four ways to make Vanilla Extract
Let’s take a look how easy it is to create your very own vanilla extract. The great thing about making your own is you can continue to make it from your last batch. A bit like how a sour dough starter works. In this post you will find out four ways of making it.
What are the four ways to make your own vanilla
In my YouTube video I show three different flavoured vanilla extracts. I also show one new method to make your own vanilla faster! Making your own extract is a long game, it takes up to six months to brew your next batch. In the video I show you how you can speed up the process by using a pressure cooker.
When using the pressure cooker, it infuses the vanilla flavour into the alcohol faster. I still recommend leaving it for several months but if you need it sooner you can use it.
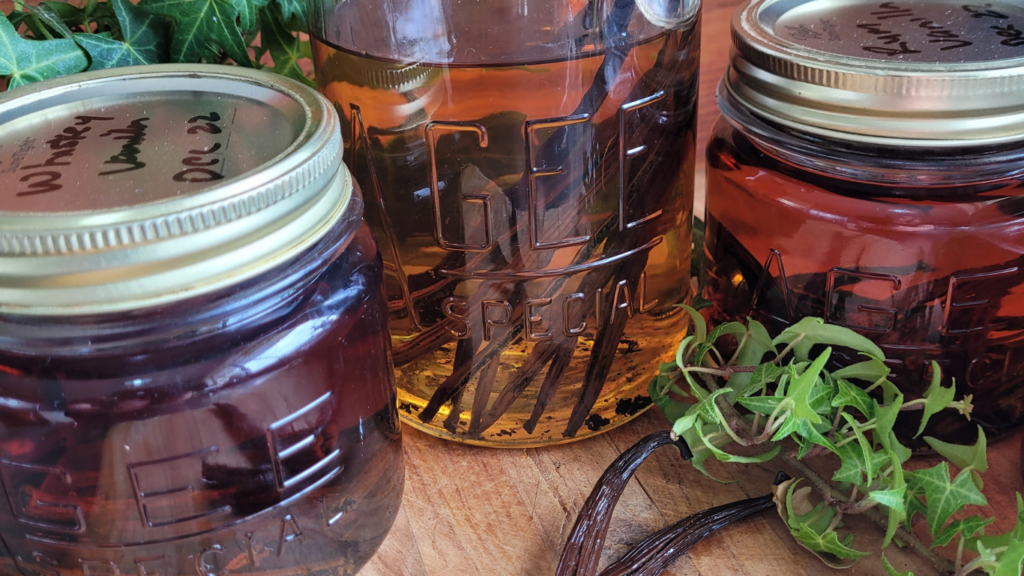
Here are the three alcohol spirits I used to extract the vanilla
- Vodka – which is the traditional alcohol used as it has no flavour, so it takes up the vanilla better
- Bourbon – I used Jim Beam Kentucky Whiskey
- Rum – I used Captain Morgan Spiced Rum, it has a lovely mellow scent and taste
How many vanilla beans will I need?
When I made mine on the video, I didn’t have enough vanilla beans. On reflection I should have made just two flavours and I would have had a stronger vanilla faster. Vanilla beans are very expensive as the crops were wiped out some years ago. I will link below some for you.
You will need approximately 6-8 vanilla beans per ounce of alcohol used. I have added the information I got in this helpful post How many vanilla beans do I need
In my video I say to use 2 beans per cup. In hindsight, it would have been better to use 4 beans per cup of alcohol instead.
How to Speed up the Process
In my YouTube video 4 Ways to make vanilla extract, I show you how easy it is. This way, you don’t have to wait for so long until you can use your vanilla. You can use a pressure cooker to help speed it up. It heats and processes the beans in the alcohol.
I used a pint jar and five beans. I split the beans down the middle and scrapped out the seeds. I then filled it with vodka until an inch head space. I placed a clean new lid and ring and screwed it up until finger tight.
I placed 2 cups of water in the bottom of my pressure cooker. Then I inserted my trivet that came with the appliance. Place the jar on the trivet and close the lid. You will process for 30 minutes, be careful to follow your pressure cookers instructions and vent before opening the lid.
The jar will be very hot so be careful when you take it out of the pressure cooker. Set the jar or jars aside on a mat or wooden board to cool thoroughly.
This vanilla will be ready to use within a week. But, leaving the vanilla to sit for a month will give a better result.
Making the Vanilla the Long Method
With the remaining beans you can make up more jars using any of the alcohol listed above. This vanilla will need to sit in a cool dark cupboard for six to twelve months. The longer you leave it the better result. I did not have enough beans to do my batch justice in my video. I left mine for well over a year. I knew it wasn’t ready sooner because when I took the lid off it still smelt of alcohol.
Homemade vanilla is a great gift to give and it’s not too late to start a batch for this Christmas. (early September here)
Decant your homemade vanilla into dark glass bottles if you have it. Don’t forget to pop the date of making it and the date it will be ready for use.
Once you make up a batch you can keep using the same beans for a few batches. Once finished with the beans don’t throw them out. Air dry them thoroughly and add them to white sugar to give them another lease of life as vanilla sugar.