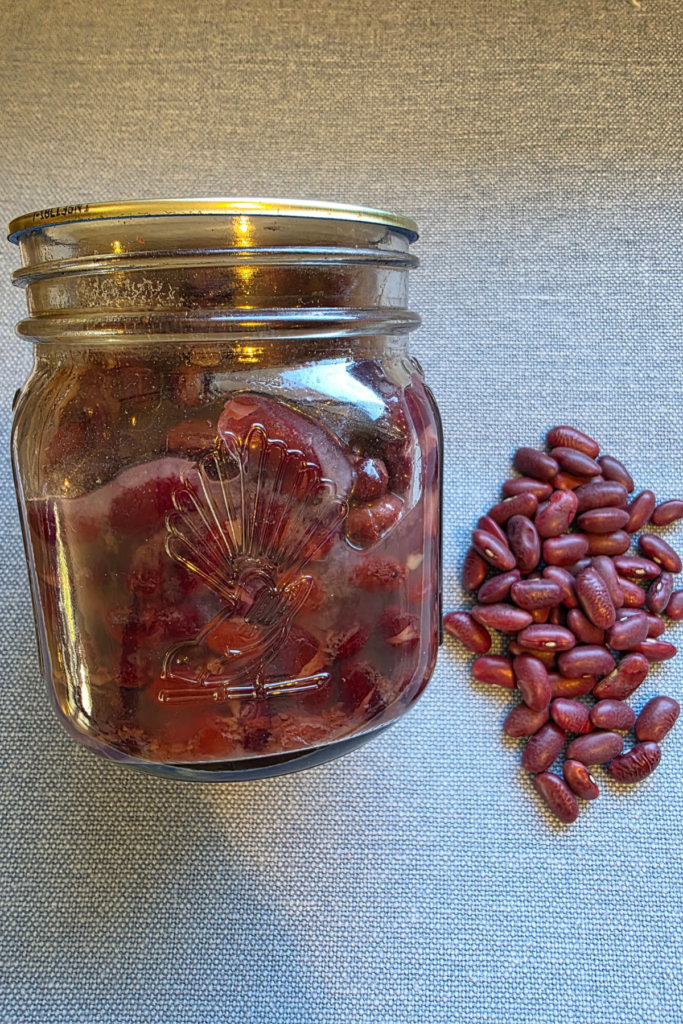
Stock Your Pantry: Pressure Canning Dried Kidney Beans
If you love the convenience of having ready-to-use beans without the preservatives found in store-bought cans. Pressure canning dried kidney beans is the perfect solution! Not only does it save you money, but it also allows you to control the quality of ingredients. While ensuring a long shelf life for your pantry staples.
In this guide, I’ll walk you through the step-by-step process of pressure canning dried kidney beans safely and efficiently.
Why Pressure Can Kidney Beans?
Dried beans are affordable, nutritious, and a staple in many recipes, but cooking them from scratch can be time-consuming. By pressure canning kidney beans in advance, you’ll always have a quick, ready-to-use option on hand.
Unlike water bath canning, pressure canning is the only safe method for preserving low-acid foods like beans. It reaches the necessary temperatures to eliminate harmful bacteria.
What You’ll Need
Before getting started, gather the following supplies:
- Dried kidney beans (1-pound yields about 5 pints)
- Pressure canner (not a pressure cooker!) I have a Presto Canner
- Canning jars (pint or quart size)
- New canning lids and rings
- Jar lifter
- Large bowl (for soaking beans)
- Salt (optional)
- Funnel and ladle
If you are based in New Zealand here is a post about where to buy a Pressure Canner Where to Buy a Pressure Canner in New Zealand
Step-by-Step Instructions
1. Prepare the Beans
Start by sorting through the dried kidney beans, removing any debris or damaged beans. Rinse them thoroughly under running water.
2. Soak the Beans (Optional but Recommended)
There are three methods:
- Overnight Soak: Place beans in a large bowl, and cover with water (at least 3 inches above beans). Let them soak for 8-12 hours.
- After soaking, drain and rinse the beans.
Soaking beans reduces cooking time and helps improve digestibility.
3. Pre-Cook the Beans
- Quick Soak: Bring beans and water to a boil, remove from the heat and let sit for 1 hour.
- Even Quicker: Bring the beans to a boil and simmer for 30 minutes.
This step ensures the beans are partially cooked and won’t expand too much inside the jars. It is also a great way can the beans if you forget to pre-soak them.
4. Prepare Jars and Lids
While the beans are simmering, wash your jars, lids, and rings in hot, soapy water. Keep the jars warm until ready to fill.
Alternatively, you can pop them in your dishwasher on a quick cycle to wash them and keep them hot. You want to ensure the jars stay hot as you will put hot beans in the jar. As a rule of thumb if the preserves are hot use hot jars. If it is cold (for example) pickles, you start with cold jars. This is to stop jar shock and breakages.
5. Fill the Jars
Using a funnel, fill the jars with hot beans, leaving 1-inch headspace. If desired, add 1/2 teaspoon salt per pint jar or 1 teaspoon per quart for flavor. Then, ladle hot cooking liquid over the beans, maintaining the 1-inch headspace. You could also use hot water. I prefer plain hot water.
6. Remove Air Bubbles and Seal Jars
Use a bubble remover or a chop stick to remove trapped air bubbles. Wipe jar rims with a damp cloth, place lids on top, and secure rings to fingertip tightness (not too tight!).
7. Pressure Can the Beans
- Add water to your pressure canner according to manufacturer instructions (usually 3 quarts).
- Place the jars inside, secure the lid. Follow your canner’s instructions to vent steam for 10 minutes before placing the weight.
- Process at 10 PSI for 75 minutes (pints) or 90 minutes (quarts). If at an altitude above 1,000 feet, adjust pressure accordingly.
8. Cooling and Storing
After processing, turn off the heat and allow the pressure canner to naturally depressurize. The gauge MUST be at 0 to safely open the lid. Carefully remove the jars. Let them cool undisturbed for 12-24 hours. Check the seals before storing in a cool, dark place. Don’t forget to name and date the jars.
Other Links and Recipes
The video on my channel shows you how to make them Stock Your Pantry: Pressure Canning Dried Kidney Beans and Chickpeas
Here is a recipe using a jar of kidney beans Russell Hobbs Multi Cooker – Easy Nachos
Enjoy Your Homemade Convenience!
Now that you have pressure-canned kidney beans, you have the convenience of homemade, ready-to-use beans. Use them in soups, stews, chili, and salads anytime! Stocking your pantry with home-canned beans ensures you always have a nutritious and delicious ingredient at your fingertips.
Have you tried pressure canning beans before? Let me know your experiences in the comments below!